Leather goods are timeless—durable, elegant, and long-lasting. But daily wear, scuffs, and cracks can make even the best items look tired. This guide helps you bring them back to life with easy, budget-friendly DIY techniques.
Understanding your leather type is key to proper care:
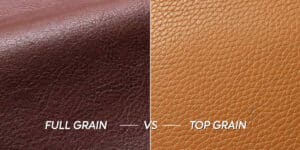
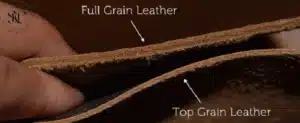
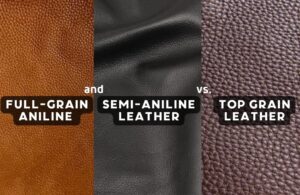
Full-grain leather: Most durable, ages beautifully with patina. Needs regular conditioning.
Top-grain leather: Slightly sanded, more uniform, still high quality. Condition periodically.
Genuine leather: Lower durability, needs more frequent maintenance.
Bonded leather: Least durable, prone to peeling. Handle gently.
✅ Tip: Always check the label or ask the seller about leather type before applying any product.

Regular upkeep = longer life & better looks.
Prevents cracks, dryness, and fading
Keeps leather supple by replenishing natural oils
Enhances patina and long-term value
Protects against dirt, moisture, and wear
Scratches/Scuffs: Often superficial; fixable with conditioner or repair kits.
Cracks: Caused by dryness; look for fine lines in high-stress areas.
Stains/Discoloration: From liquids, dyes, or sunlight; treat quickly.
Peeling (especially on bonded leather): Usually irreversible but can be slowed down.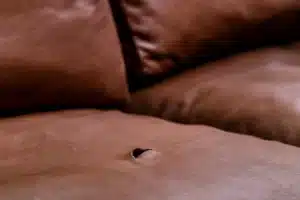
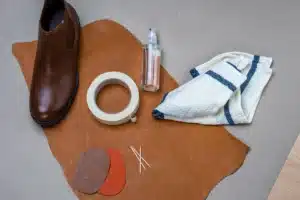
Gather these essentials:
Leather cleaner & conditioner
Repair kit (color compound, applicator, filler)
Leather glue (flexible adhesive)
Sub-patch (for tears)
Soft cloths or sponges
Leather dye (for recoloring)
Seam roller (to flatten patches)
Light marks? Try this:
Clean the area with leather cleaner.
Apply conditioner using a soft cloth.
Buff gently until the mark fades.
Deeper scratches?
Sand lightly (optional).
Use leather filler or compound from a repair kit.
Let dry & seal with leather finish.
Clean area thoroughly.
Apply glue to edges of the tear.
Insert sub-patch if needed.
Press & secure with masking tape or clamp.
Dry completely, then apply matching dye if needed.
Seal with a leather finisher.
Clean gently with leather-safe cleaner every 2–3 months.
Always spot test products first.
Use circular motion to apply conditioner.
Let absorb, then buff to shine.
✅ Pro tip: Never soak leather or use household cleaners—they can damage the surface.
Avoid direct sunlight, heat, and humidity.
Store in breathable covers (not plastic).
Keep items dry, and clean spills immediately.
Condition regularly to prevent cracks and dryness.
Don’t overload bags or overstretch items.
Seek expert help if:
Damage is deep, widespread, or structural.
Item is high-value or sentimental.
You’re unsure about the leather type or repair method.
With just a little effort and the right approach, you can keep your leather goods looking polished, protected, and pristine for years.